
How to create seamless Tattoos between Meshes
Continuous tattoos, scars or other decals make you want to pull your hair out because you cannot get them match entirely in Photoshop? This tutorial will teach you a method on how to do this very easily without loosing any hair!
Preface
Before starting there is a small understanding about texture space you need. What you will usually see is that head and body have the same texture dimensions. In some cases one of them might be smaller than the other. In general, if following the usual layout of body texture UV maps, the neck area on the texture is pretty small. Below is a comparison:
Face texture 2048x2048 pixels: The selected area on the neck is ~15x20 cm big.
Body texture 2048x2048: Around the same selected area is just ~5x5 cm big.
This means that whatever tattoo you put on these images: upper half will be 15x20 cm big, while the lower will be less than half the size, being only 5x5 cm. This results in the tattoo looking high res on the head part but then turning blurry on the lower one.
In order to fix this, make the body image twice as big as the head (if head is 1024x1024 pixels, make the body 2048x2048 for example), unless both already are 4096x4096 pixels:
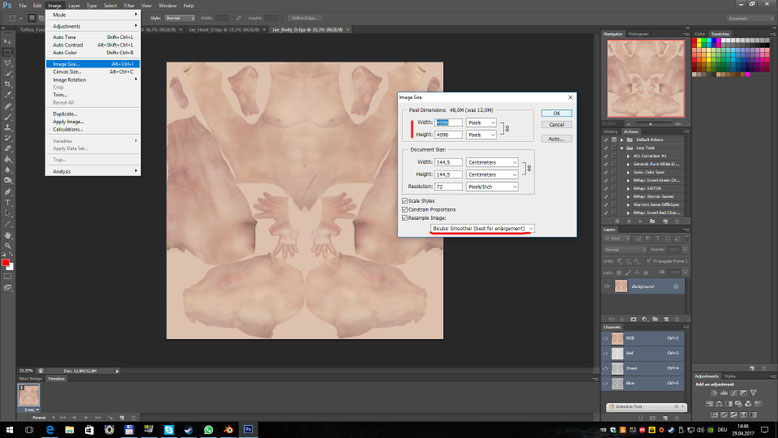
This results in the size difference between those two areas to be much smaller. It now is ~10x10 pixels and should look fine along with the neck.
This can of course also be the other way around. You have to check depending on the model.
Note that this tutorial is based on models that do not have mirrored textures (Final Fantasy until XIII, Dead or Alive 5,....). I will cover in a different tutorial on how to create non-mirrored textures for them.
Tutorial
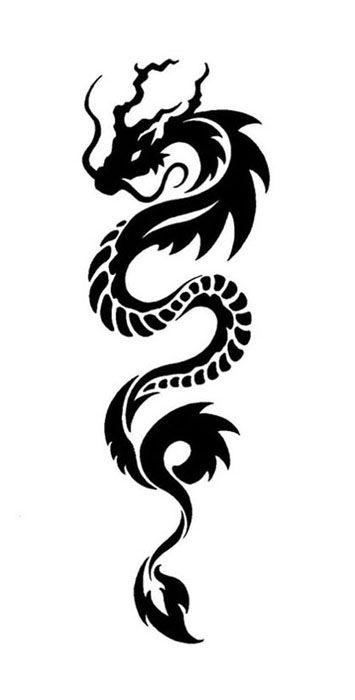
Now for the actual tutorial. The requirement it needs is a seamless neck model and a image of your tattoo with a plain white background like the one on the right.
1. Load your model in Blender, select head and body mesh and press Ctrl+j to join them:
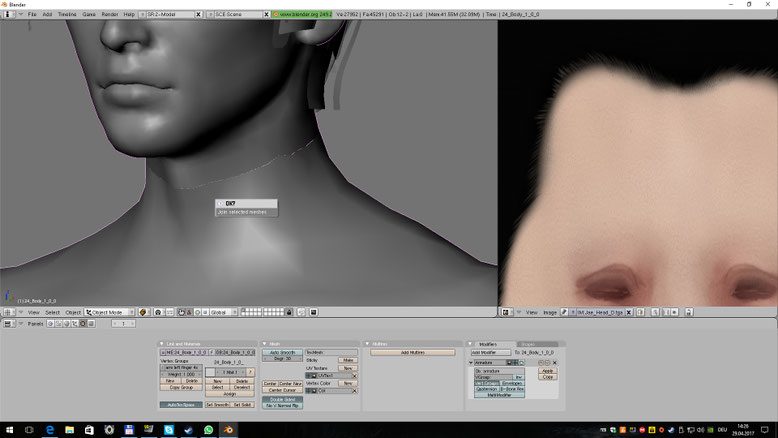
2. Go into Edit Mode and remove doubles with a value of 0.000:

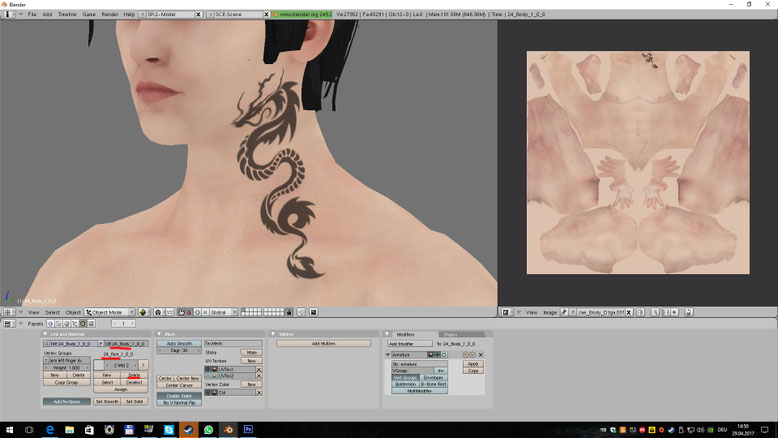
3. Go back into Object Mode and create a new UV layer with the button circled. You can name it anything you want, for this tutorial it will simply be UVTex2. Make sure the button in front of the name, underlined in this picture, is selected:
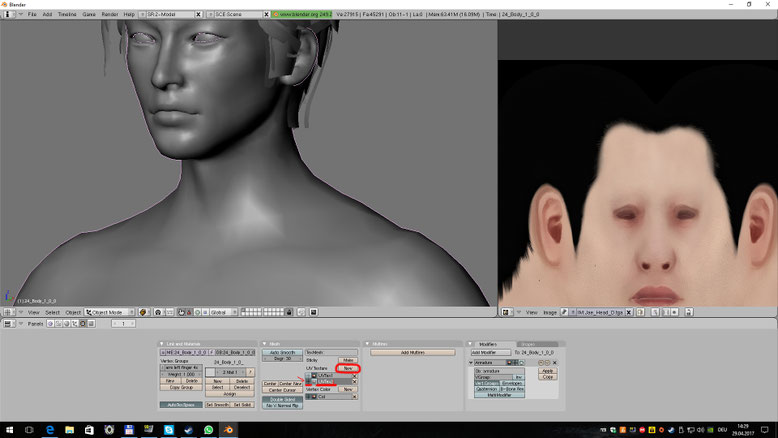
4. Open your Tattoo image in the Image/UV Editor and switch to Textured view:

5. Scale the whole UV very small, so it turns your model completely white and is not near any colored parts of the texture:
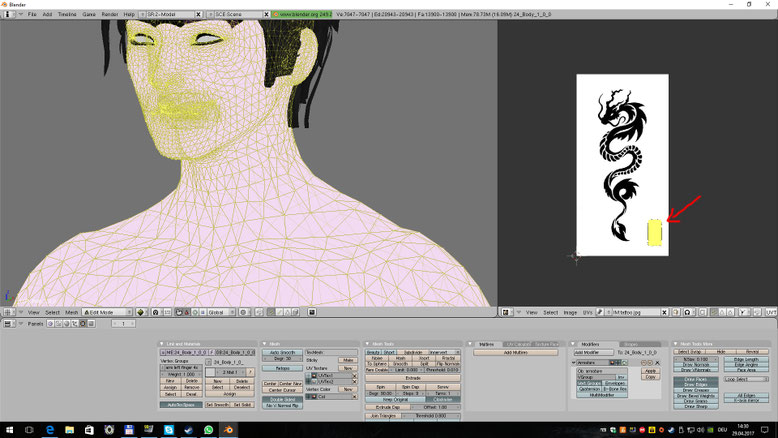
6. Now switch to face select mode and only front faces visible (red circle) and select the area you want your tattoo to be (blue circle). Make the selecting roughly and also make it bigger than the tattoo itself so you have a bit of freedom when aligning.
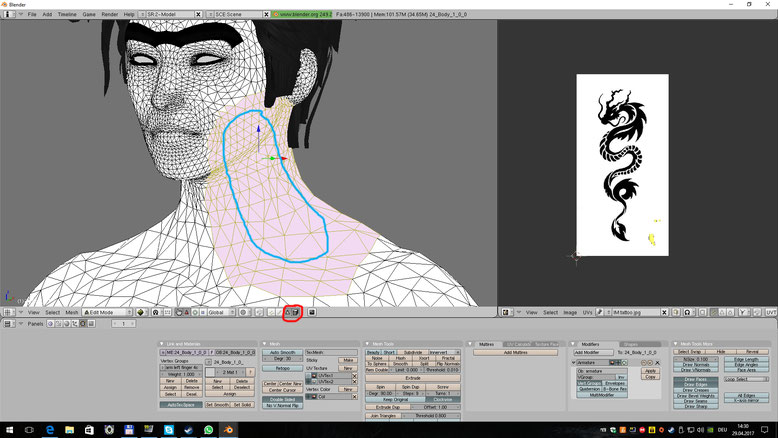
7. Once you are satisfied with your selection press u and select 'Unwrap'. In some cases 'From View' is useful but use it with care. Unwrap is the better option in this case. It will result in the UV looking as in the following image:

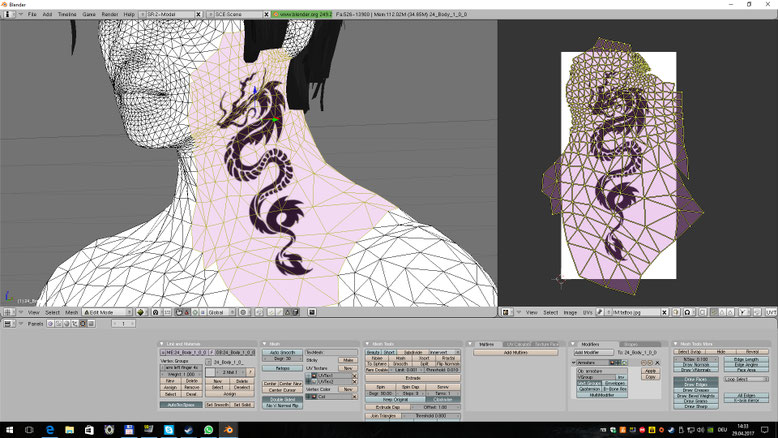
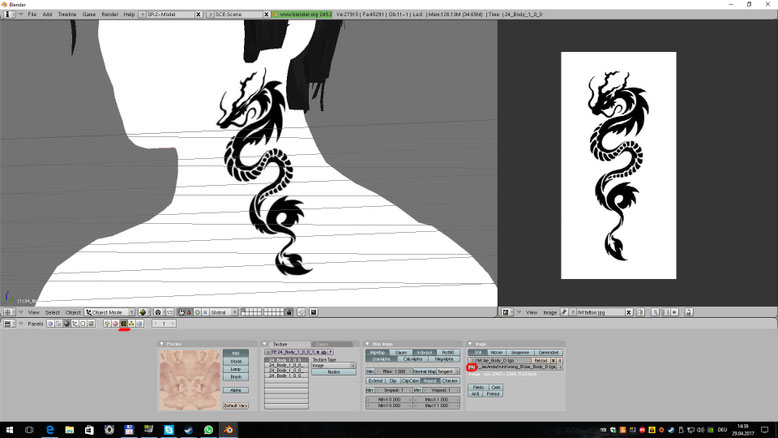
8. Now scale, rotate and move this new uv around until the tattoo is aligned as desired:
9. Now go back to Object Mode and navigate to the material options as shown below. You have to disable (un-tick) all other textures except for the first one:
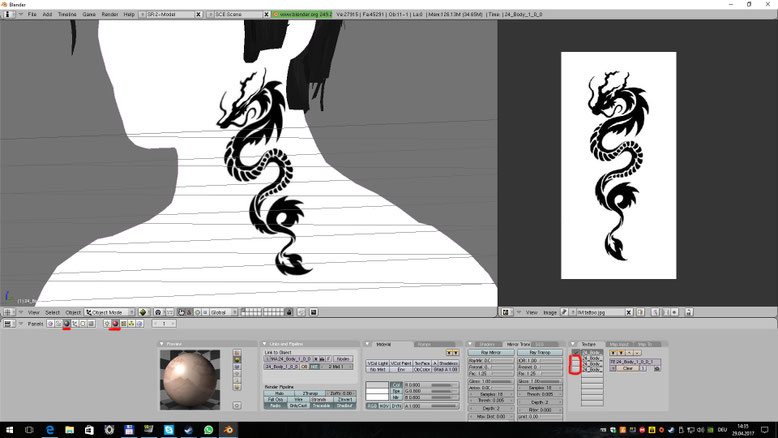
10. Click Map Input and change the UV name to your new UV map: UVTex2.
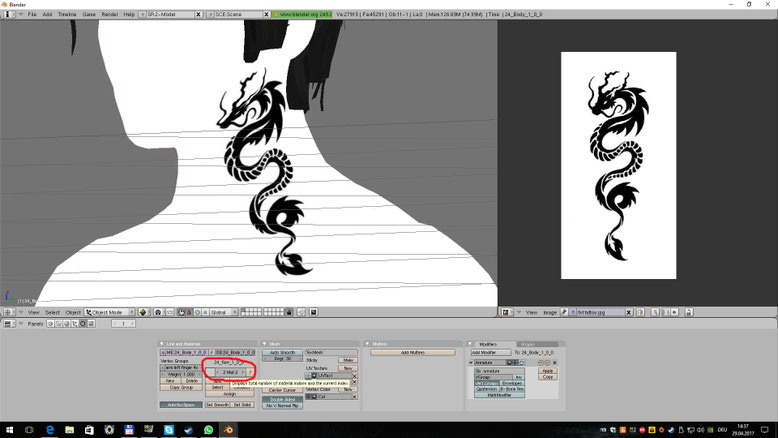
11. Load your Tattoo image instead of the real diffuse:
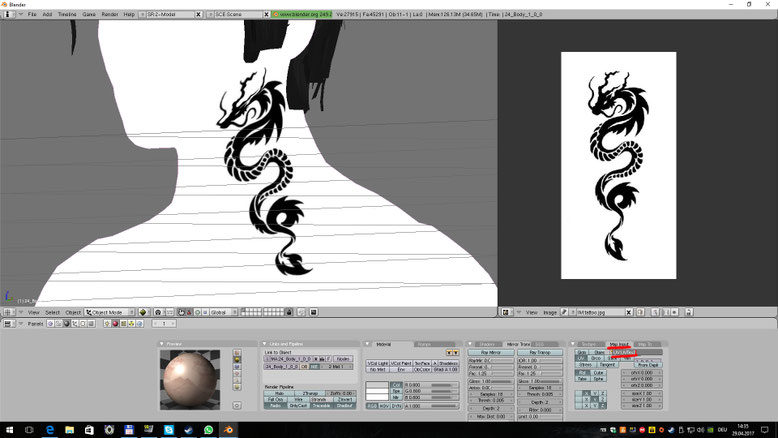
12. You have to repeat this for the head material aswell. You can switch materials using the two arrows in the circled area:
13. Now select everything and press p, then 'By Material'. This will split the model in its previous parts again.

14. Switch back to UVTex1 layer (red arrow), then create a new image with the option shown in the second image. Make sure you set the dimensions as the dimensions of the diffuse image for the mesh part you are currently setting up. Also make the image pure white.

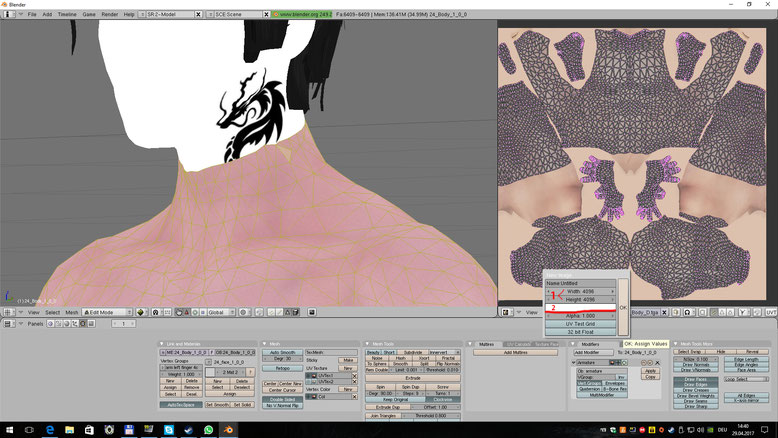
15. Navigate to the image baking options. They are where you also bake AO maps. Make your settings look like below. Make sure every button is exactly set up as on the image!
Press the Bake button once it is all set, wait a few seconds (it really does not take long), then Save the image with a name you will find again.

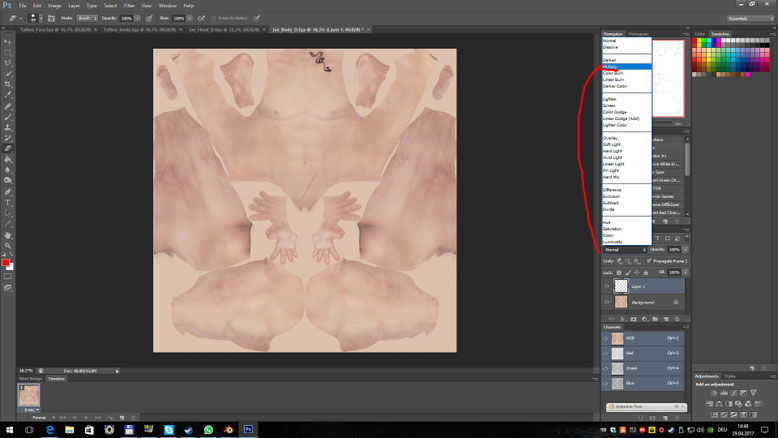
16. Repeat Step 15 for the head aswell. After that load the new texture you baked and the original body diffuse of that part in Photoshop. Paste the Tattoo texture
over the Diffuse and set its layer to 'Multiply'. Play around with the opacity until you are satisfied. Do this to the head texture
aswell.
(You can also use this baked image as an alpha mask and paint the layer in any color you want.)
17. Load your new textures in blender to see if everything is alright. When it looks good you are done here!
For a flawless export revert the material changes done in step 10 and 11. Also delete one of the assigned materials per mesh part (head material from body mesh, body material from head mesh).
Also delete the secondary UV you did for the Tattoo using the small X button behind its name.
Your model should now have a seamless Tattoo on the neck area! You can use this method on any part you want and with any sort of texture edits.